Salesforce

Adding a Zebra Printer in a CUPS Printing System

« Go Back

Information

 
Issue / QuestionHow to add a Zebra printer using CUPS Printing System?
How to install Zebra printer CUPS Printing System?
Applicable ToAll Zebra printers
Resolution / Answer
IMPORTANT! Zebra suggests using the Common Unix Printing System (CUPS) driver for use on Mac OS X operating systems. The CUPS driver is pre-installed on Mac OS X operating systems. Therefore, it is not necessary to download and install a driver for Zebra printers on Mac OS X.

Zebra Mac OS X drivers are available for selected Zebra Card Printer models. Read this article to learn more.

The CUPS driver is directly built-in on the Mac OS and some Linux versions. 
 
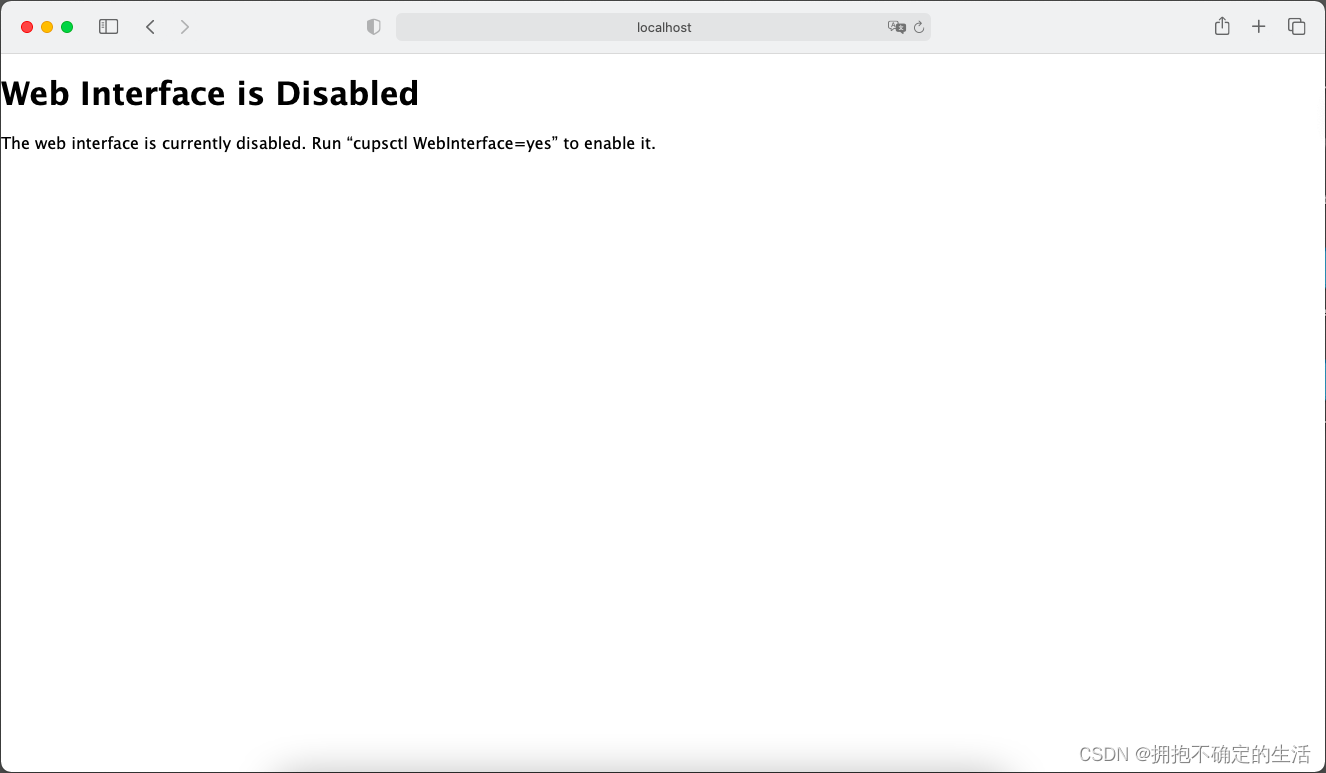
NOTE Optionally, using Safari for Mac or Mozilla for Linux OS, enter either http://localhost:631/ or 127.0.0.1:631/ to access the CUPS driver.
The following examples are based on the 1.4.2 version of the CUPS driver, which requires the Snow Leopard Mac OS installation.
The CUPS contributors made significant changes to the 1.4.# interface compared to the previous 1.3.# versions.


Procedure:
  1. From the Home tab, select Adding Printers and Classes.
  1. Select Add Printer (Classes are just a way of grouping similar printers if a customer chooses to).
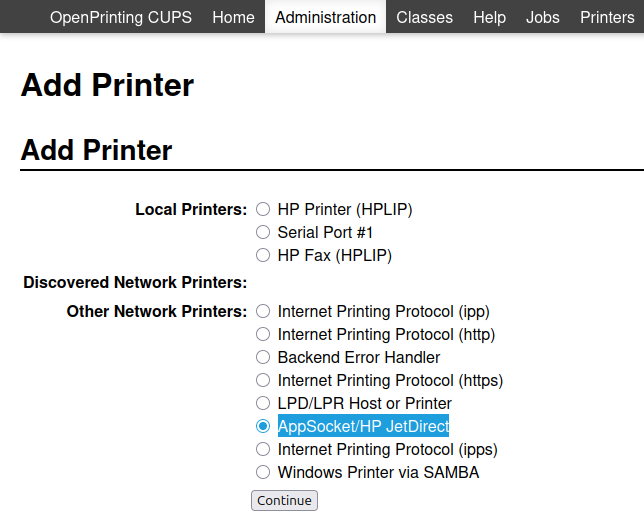
Ethernet Connected Printer

After CUPS completes  the “Looking for printers…” step, any other options available but not listed here depend on your Mac or Linux Operating System configuration.  
 
NOTE Zebra Print Servers do not support HTTP or IPP printing.

Zebra printers are capable of LPD or LPR printing. However, on Mac and Linux OS, it is intended to be used for Command-Line or Print Queue printing. Zebra’s support of the CUPS driver does not extend to Command-Line or Print Queue printing.

Windows Printer via SAMBA is a shared printer created with the Operating System and is not covered by these instructions or supported directly by Zebra.


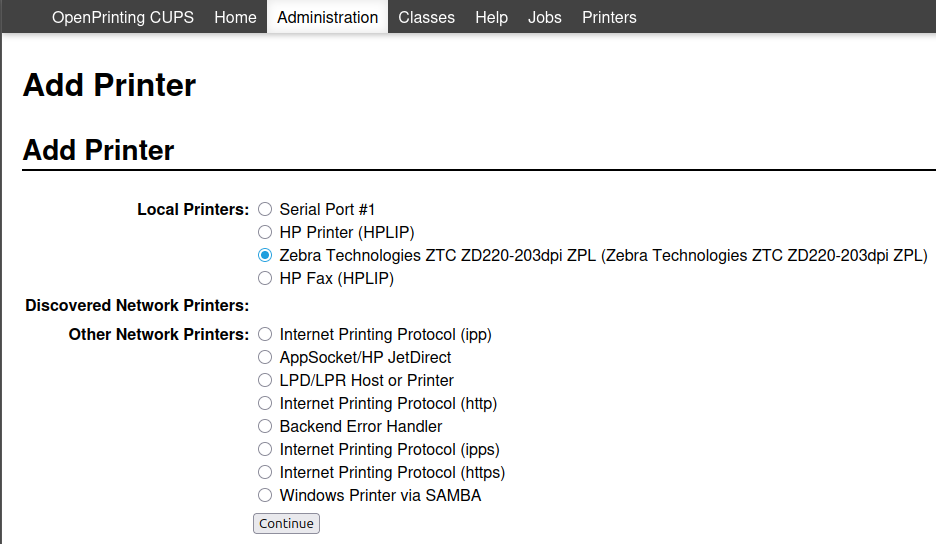
USB Connected Printer
 
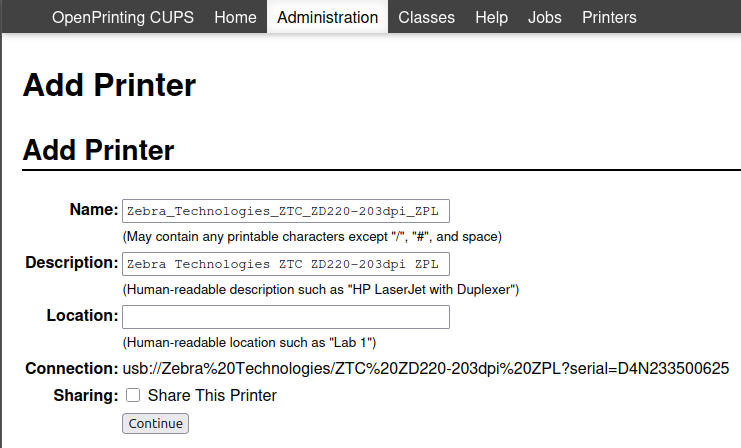
  1. When a Zebra USB printer is connected, the CUPS finds the printer and adds it to the list of Local Printers.
  2. After selecting the AppSocket / HP JetDirect option for Ethernet-connected printers or a printer from the list of Local Printers, click Continue
Serial and Parallel are possible connections for Linux supported OS that can be made available as the printers are connected.

A Linux Admin could send the following commands to create the ports:
  • To enable the serial port in Linux: Chmod a+rw /dev/ttyS0
  • To enable the parallel port in Linux: Chmod a+rw /dev/lp0 or /dev/lp1
  1. Name and Description are automatically populated for a USB-connected printer. Optionally, you can change the name and description. 
Sharing is optional and controlled by users created on the OS. By default, the sharing checkbox is selected.
 
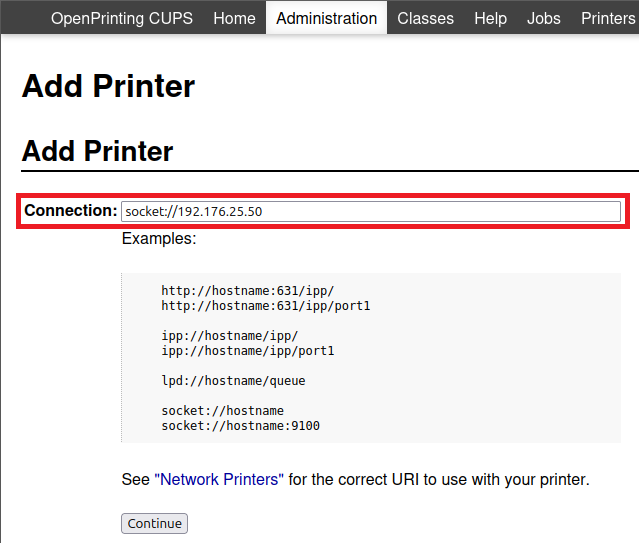
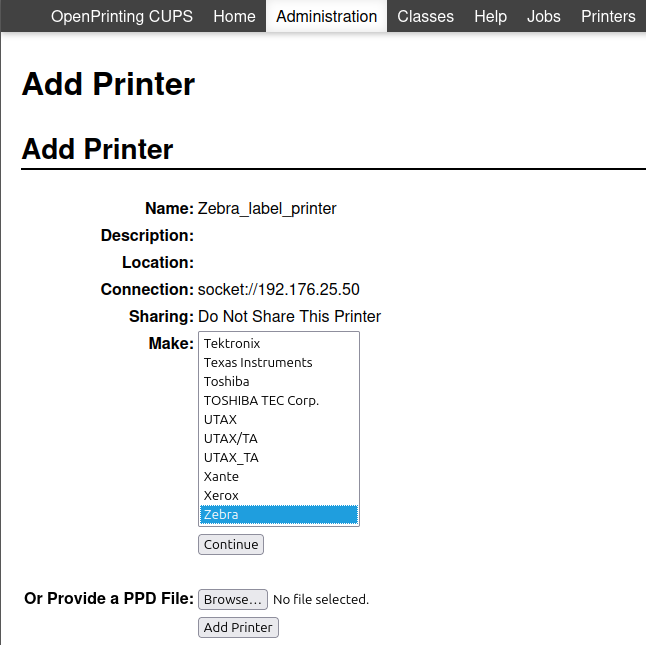
  1. When AppSocket / HP JetDirect is selected, the following screen appears, prompting for a connection. Enter socket://IP Adress:9100 for example: socket://10.3.9.55:9100 (addresses may also populate to select from).

For Ethernet-connected printers, the Name and Description start as blank.
 

By default, the sharing checkbox is not selected. Click Continue.

  1. Select Zebra (for USB-connected printers, Zebra is selected for you), then click Continue.
 
NOTE Providing a PPD File is only used for instances when a Make: (the field that you need to select above) is not available, the manufacturer has provided a PPD file to you to populate manually. Assistance for Zebra printers from Zebra is not available for PPD files, only available when the available Zebra option is selected.


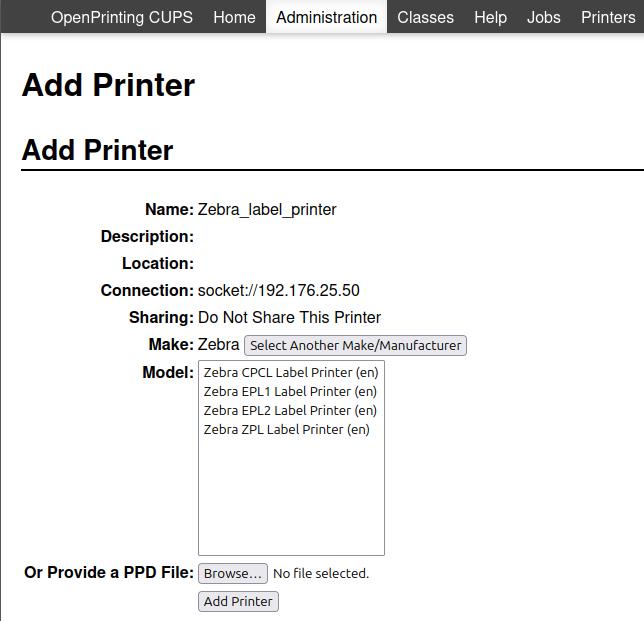
Within the CUPS driver, Zebra printers are not selected by model, only by printer language.
  • CPCL is a mobile printer language (some mobile printers can also understand EPL or ZPL). 
  • EPL1 and EPL2 are primarily desktop printer languages.
  • ZPL is primarily a tabletop printer language or desktops ending with a –Z (Ex: LP2844-Z). 
*G-Series printers understand both EPL and ZPL.
  1. Select a language, then click Add Printer.


Because printers are not selectable by model, default options that do not apply to your printer model may be available. At this point, it is best to have a printer’s configuration label and printer specs available to make correct choices.

The following are examples of options available for a ZPL language printer:

Media Size has a long drop-down list of available label sizes to select. At the end of the list, you can choose the Custom option and enter your label size (recent tests show custom page sizes entered in the CUPS v1.4.2 are not saved.  A bug report will be submitted to CUPS.org).

The resolution has a drop-down list of:

If you are unsure what to select, here is important to refer to and match the printer’s configuration label. Print larger or smaller than expected usually means the wrong resolution (dpi) was selected. On a ZPL configuration label:
  • RESOLUTION 832 8/MM FULL = 203 dpi
  • RESOLUTION 1232 12/MM FULL = 300 dpi
  • RESOLUTION 1632 16/MM FULL = 600 dpi

Media Tracking:


Media Type:

Printer Default means no command will be sent, and the current setting of the printer will not be changed. Thermal Transfer Media means the printer is using a ribbon. Thermal Transfer printers can work with or without ribbon. If they work without ribbon, the media needs to be direct thermal. Direct Thermal Media means there is no ribbon used and the media and printer setting must be direct thermal. 
 
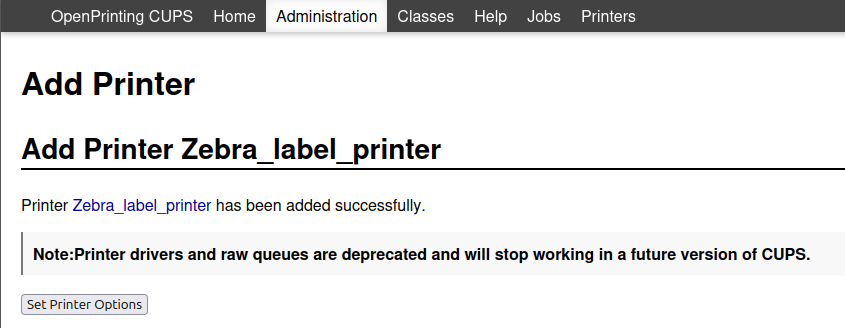
  1. Click Set Default Options after selections have been made, and the following screen appears.
  1. Click Maintenance for these options.
  1. Click Administration for these options.
 
  1. Choose Modify Printer or Set Default Options to go back and make changes to the initial settings. 

Other printer languages have the following General Options available:

EPL1

Media Size (1.25 x .25 – 4.00 x 13.00 and Custom)
Resolution (203/300/600)

EPL2

Media Size (1.25 x .25 – 4.00 x 13.00 and Custom)
Resolution (203/300/600)
Media Type (Thermal Transfer or Direct Thermal)

CPCL

Media Size (2 x 1 – 4 x 6 and Custom)
Resolution (203 dpi only)
Media Tracking (Continuous, Non-Continuous, or Mark) 


Common Issues with CUPS:

Q: I want to add a printer but was asked to enter a name and password. Which name and password do I use?
A: Use the username and password for your computer.

Q: I am trying to add a printer through the CUPS GUI. But when I enter my CUPS.org username and password, it just keeps asking me for my username and password! How can I use the CUPS GUI?
A: Do not use your CUPS.org username and password as they will not work. Use the username and password for your computer instead.
 
Q: The CUPS web interface keeps asking me for a password, but I don't have one on this computer. How can I use the web interface?
A: If you have set up your computer not to require a password or have a blank or empty password, then the CUPS web interface will not work for you. CUPS requires a login username and password to allow you to make changes through the web interface.

Helpful Information
 
 
URL NameAdding-a-Zebra-Printer-in-a-CUPS-Printing-System
TitleAdding a Zebra Printer in a CUPS Printing System

Powered by