Salesforce

Installing a Network Zebra Printer on a Windows 11 or 10 PC

« Go Back

Information

 
Issue / QuestionHow do I add a network printer using a Windows 11 or 10 PC?
I want to attach a network printer, how do I proceed?
Configuring a Windows Queue to communicate with an Ethernet-connected printer.
How do I install a network printer using Windows?
Applicable ToWindows and ZPL based printers, except by ZQ110, EM220, and EM220II
Resolution / Answer
  • Find your printer's latest driver by visiting Support and Downloads: Printers Support.

  • Then, you can continue to install your printer with ZDesigner Driver v5 or v10 to add the printer.

  • In case the above does not work, then you can do the following:


Procedure:


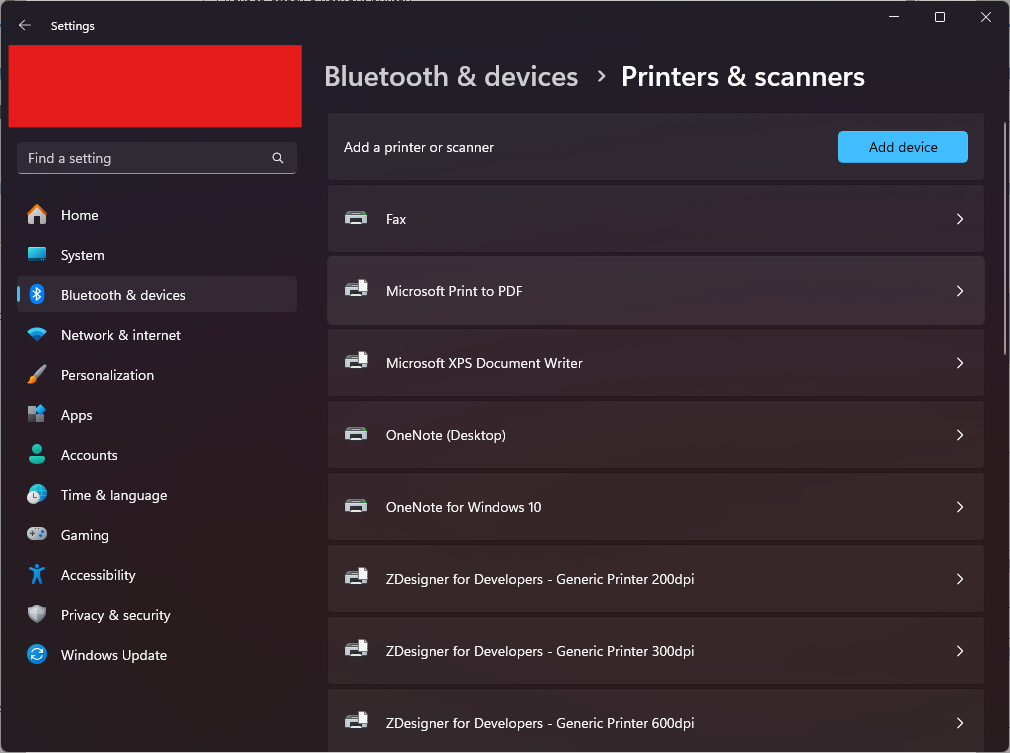
  1. Navigate to Windows Settings - Bluetooth and Devices - Printers and Scanners.


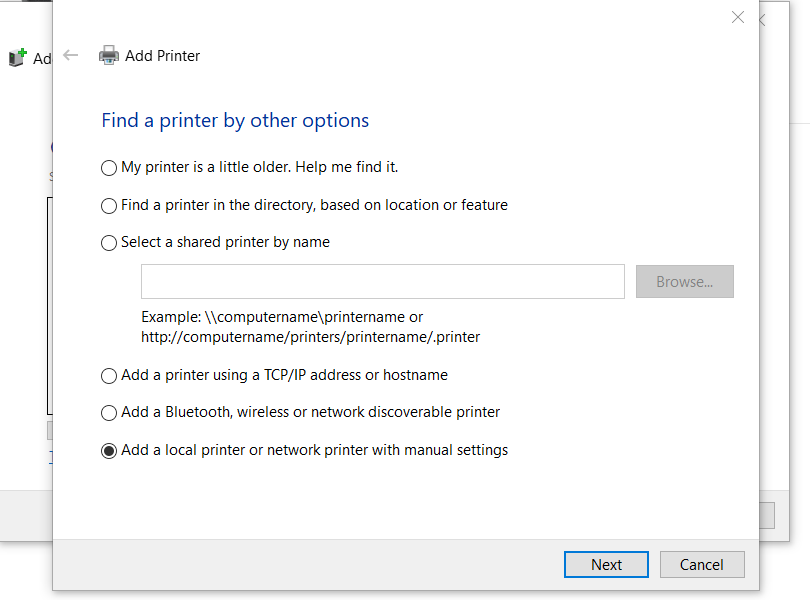
  2. Select the Add a local printer or network printer with manual settings option and click Next.
    User-added image

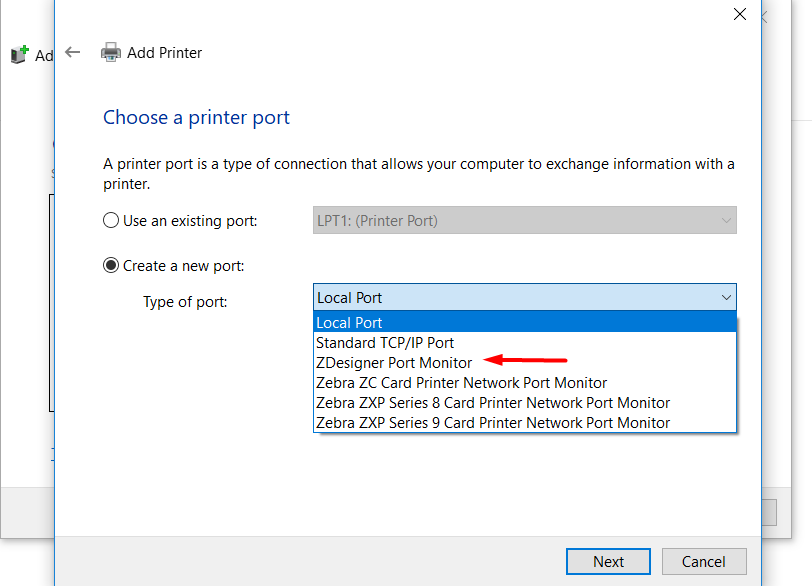
  3. Select Create a new port and select ZDesigner Port Monitor from the drop-down menu. 
    User-added image

  4. Enter the printer IP address in both the empty fields, click OK, and click Next.
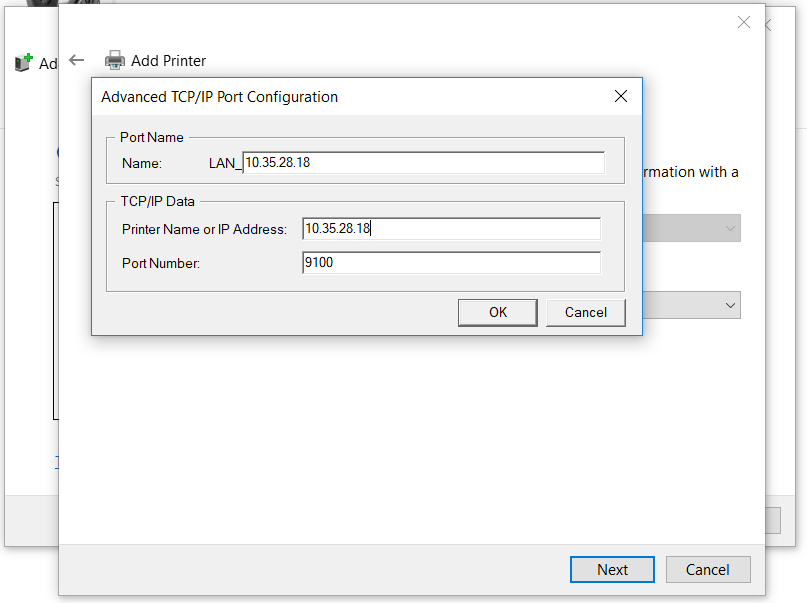
     
    NOTE If you need help finding the IP address, refer to Choosing & Assigning an IP Address Using Zebra Setup Utilities (ZSU) article. 

    User-added image

  5. From the left panel, select ZDesigner and select the printer model on the right. Click Next.
     
    IMPORTANT! Take note of the printer resolution expressed in dpi.
User-added image
  1. Optionally, change the printer's name and click Next.
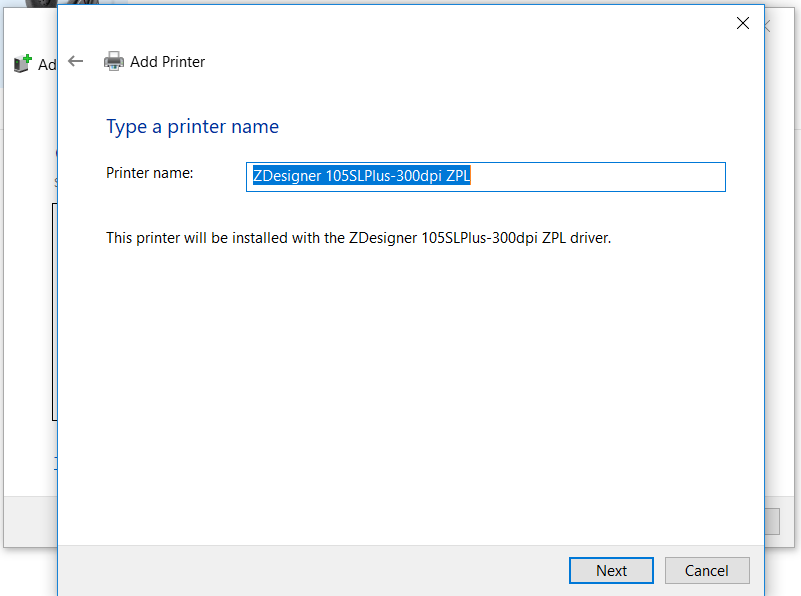
    User-added image

  2. From Printer Sharing, select the option that fits your needs. 
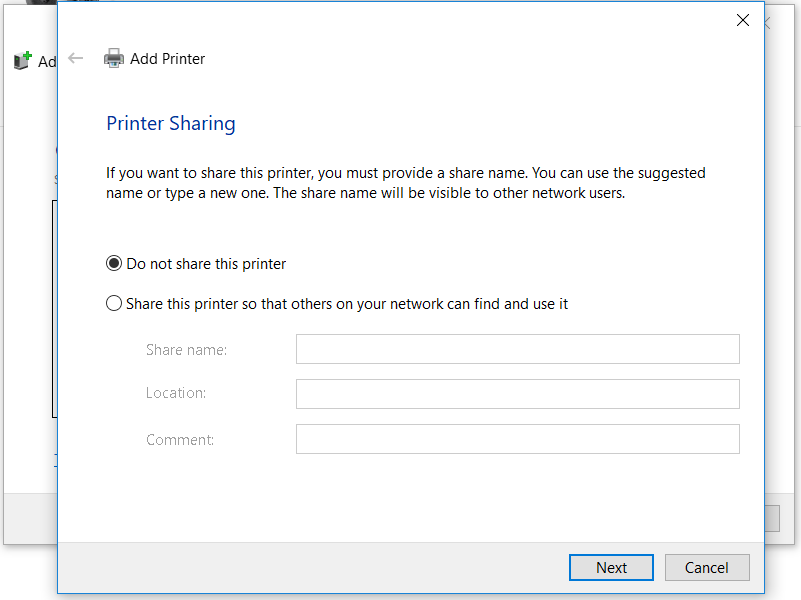
    User-added image

  3. Click Print a test page to test the communication between the computer and your printer. Click Finish to end.
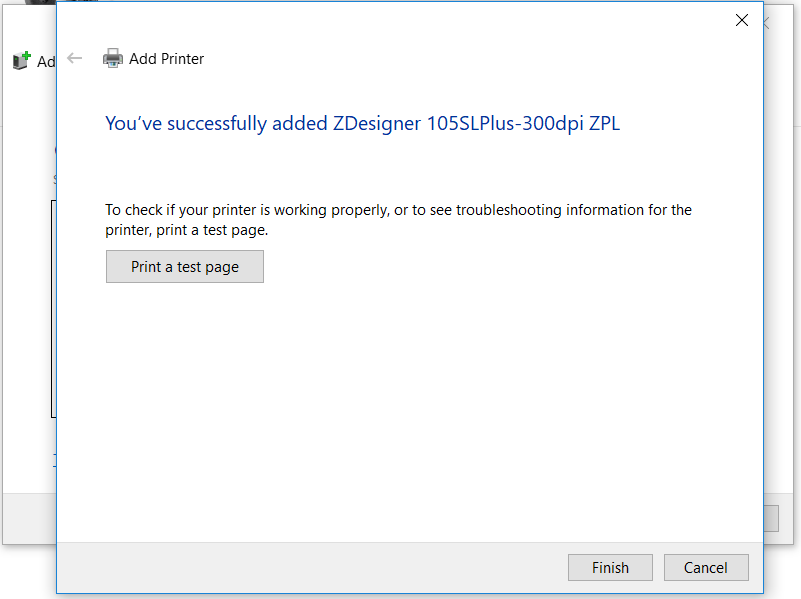
    User-added image


User Manuals for the ZebraNet Print Servers:


Helpful Information:


    URL NameAdding-a-networked-Zebra-Printer-to-a-Windows-PC
    TitleInstalling a Network Zebra Printer on a Windows 11 or 10 PC

    Powered by