The ZDesigner driver creates CPCL, EPL, or ZPL based on the printer driver selected and the language specified in the driver name. In order to capture the true printer-language output of the driver, you can simply choose the Print to File option, if it exists, from the application you are using the ZDesigner driver with.
Procedure
In Word 2010, for example, after clicking File > Print you would click the drop-down arrow to show the list of available printer drivers...
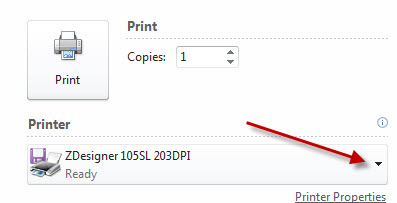
With the ZDesigner driver selected, choose the Print to File option from the end of the list of drivers.
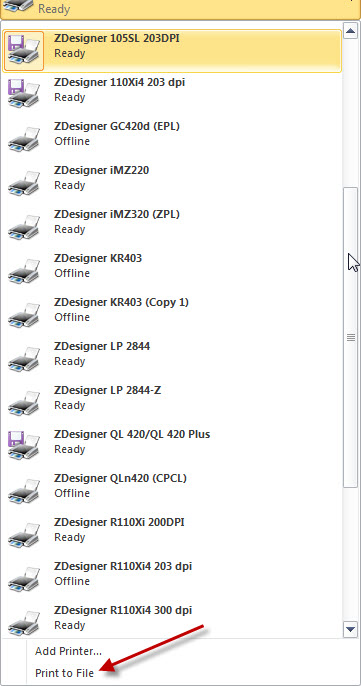
Click 
The Print to file screen will appear. Here you have the option to choose the location where the file with Zebra printer language will be created and to enter a name for the file.

It is also possible, but not necessary to use the following instructions for creating a port that includes the file name and location. With this method, only one file name is created and will be overwritten each time. To keep the file created you will need to rename it before capturing again.
Print-To-File
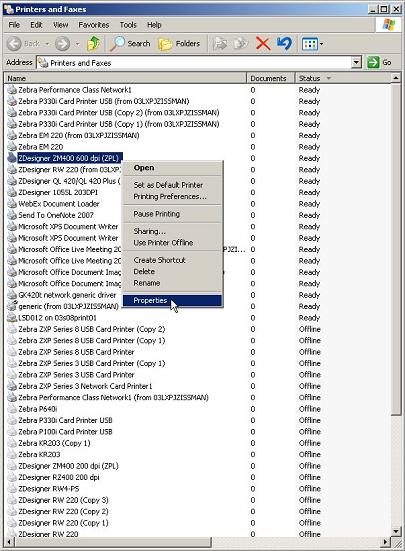
1. Right-click on your printer and it appears in Printers and Faxes > Printers and Devices. Select Properties.
2. Choose the 'Ports' tab. Make a note of the full port name currently assigned to the printer. Select Add port > Local Port > New Port. In the text box, enter the file where you wish to capture the printer driver output. In our example, we use C:\ZebraPrinterOutput.txt.
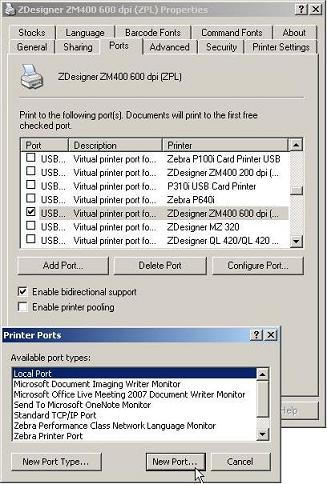
3. Finally, confirm that your file port is created and is checked as the current port in use.
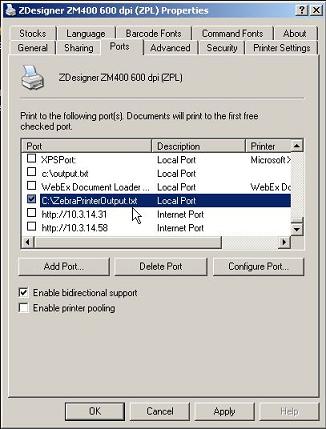
At this point, print jobs sent to the printer will be processed by the driver and sent to the file you indicated in step two instead of being printed. When done capturing output, you can return the driver to its original printing state by simply navigating back to the ports window and reselecting the original port as noted in step two.
Helpful Information


