 | IMPORTANT! Zebra recommends using the Common Unix Printing System (CUPS) driver for Zebra printers on Mac OS X. Most Mac OS X systems come pre-installed with the CUPS driver, eliminating the need for additional downloads. However, specific Zebra card printer models may require separate drivers. Learn more. |
Adding the Printer:
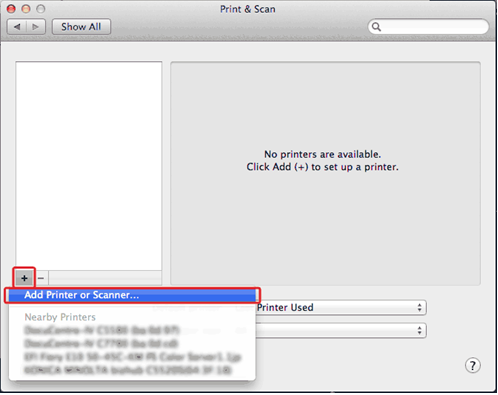
- Navigate to Printers and Scanners.
- Click (+) and choose Add Printer or Scanner.

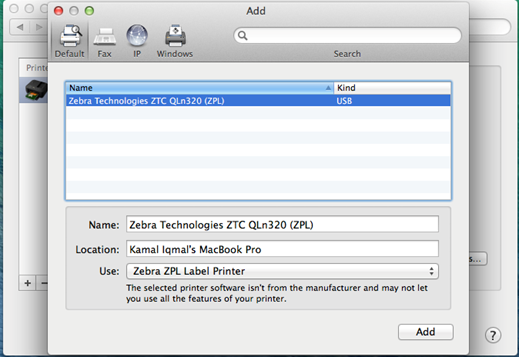
- Choose your Zebra Printer. It should be displayed as follows:
- In the Use section below, select Select Software.
- You may choose your preferred driver's language. If you do not know which language to use, you may choose ZPL.
- Click Add to complete the setup.

Logging into CUPS:
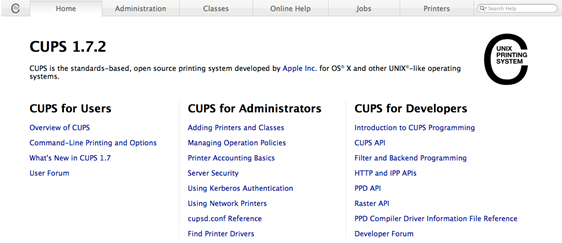
- Access the CUPS printer settings page by visiting http://localhost:631/printers/. You may also copy and paste it into Safari.
- If prompted for authentication, enter your Mac's account credentials.
- To enable CUPS Control, select and copy 'cupsctl WebInterface=yes'.

- Next, click the magnifying glass in the top right-hand corner of your screen and search for Terminal.
- Once in the terminal, paste in cupsctl WebInterface=yes, and press enter.

- You should now be able to go to http://localhost:631/printers/ and see your installed printers.

Modifying Printer Settings in CUPS:
- On the http://localhost:631/printers/ main page, click the Printers tab.
- Select your printer.
- Choose Set Default Options from the drop-down menu.
- Adjust settings like Media size, Resolution, Media tracking, and Media Type according to printer specifications.
- Click Set Default Options to save changes.
Printing a Test Page:
- From the Printers page in CUPS, select Print Test Page from the drop-down menu.
Helpful Information:


