 | IMPORTANT! Using CUPS Driver
- Recommendation: Zebra recommends using the CUPS driver for MacOS operating systems.
- Pre-installed Driver: The CUPS driver comes pre-installed on MacOS devices. Therefore, you do not need to download and install a separate driver for Zebra printers on MacOS
- Zebra Mac OS X drivers are available for selected Zebra Card Printer models. List of ID Card Printers with Mac Drivers
|
CUPS (Common UNIX Printing System) is a network printing system that enables MacOS devices to connect to various printers on a network, including Zebra printers.
To add Zebra printers to your Mac using the CUPS web interface, follow these steps:
-
Check the CUPS web interface:
- Open your web browser and navigate to
http://localhost:631/printers/.
-
Enable CUPS if disabled:
- If you see the message "Web Interface is Disabled," CUPS is currently disabled on your Mac.
-
Enabling the CUPS web interface:
- By following these steps, you can ensure your Zebra printers are accessible on your network via your MacOS device.
Enable the CUPS Web Interface
- Select and copy the cupsctl WebInterface=yes command from the page.
- Click the magnifying glass icon in the top right-hand corner of your screen and search for Terminal.
Double-click the first search result to open the
Terminal app.
- In the Terminal app, paste the command cupsctl WebInterface=yes and press Enter.
- If you go to http://localhost:631/printers/ you will see the CUPS web interface enabled and a list of your installed printers.
Add a Wi-Fi or Network Printer
 | NOTE Before you start, ensure that your Mac and a printer are connected to the same Wi-Fi network. |
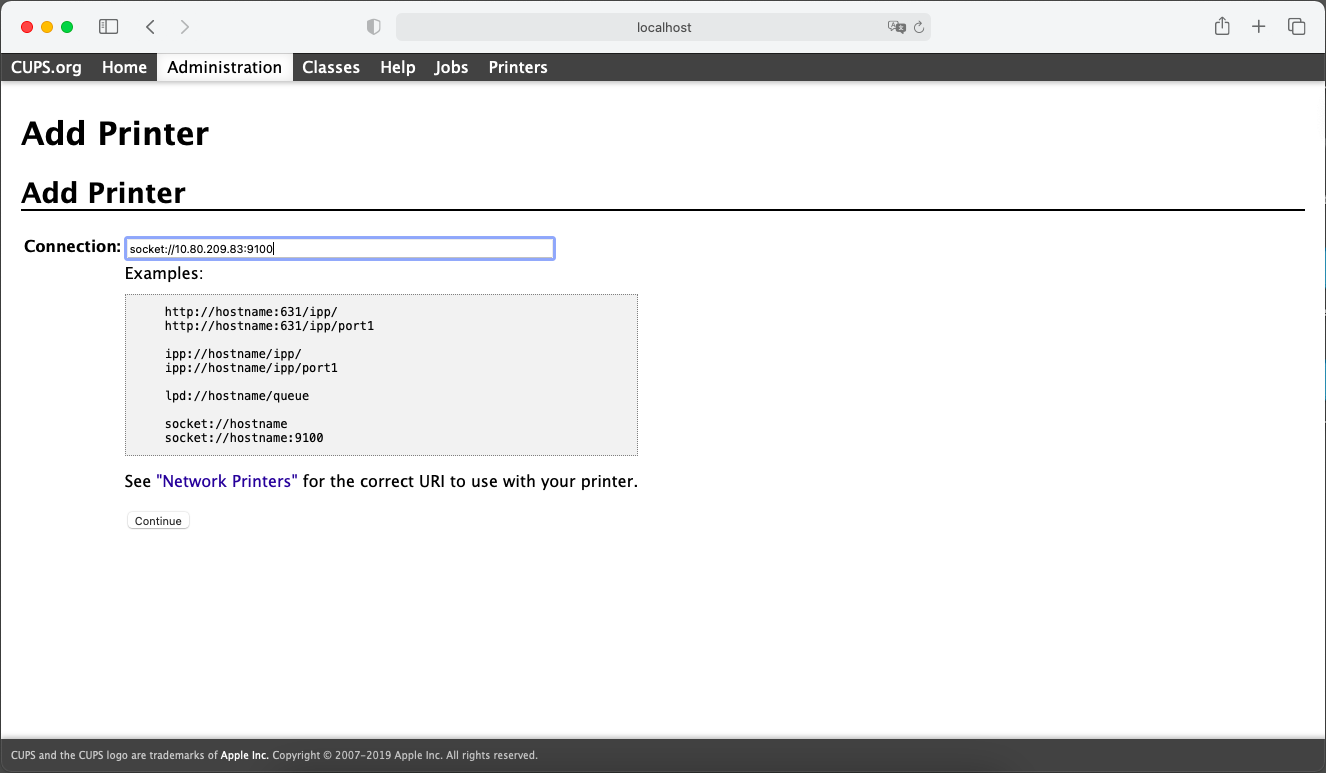
- Open a web browser on your Mac and go to http://localhost:631/
- Click the Administration tab and then click Add Printer. You may be prompted to enter the name and password of an administrator to verify that you are a user with administrator privileges.
- In the Add Printer window, choose either LPD / LPR Host or Printer or AppSocket / HP JetDirect and click Continue.
- If you have selected LPD / LPR Host or Printer, enter lpd://<hostname>/queue in the Connection text box; where <hostname> is the IP address of the printer you wish to connect to.
If you have selected
AppSocket / HP JetDirect, enter
socket://<hostname>:9100 in the
Connection text box; where
<hostname> is the
IP address of the printer you wish to connect to.
- Enter your printer's details (name, description, and location) as desired and click Continue.
- Next, select Zebra in the Make drop-down list and click Continue.
- Finally, select Zebra ZPL Label Printer in the Model drop-down list and click Add Printer.
Print a Test Page
- Click the Printer tab, and click your printer's name.
- Select Print Test Page in the drop-down list to print a test page.
Helpful Information:

