 | End Of Service Life (EOSL) Zebra no longer provide services or support for P100i, P110i, P110m, P120i, P330i, P330m, P430i products. This knowledge article is for your reference only and is no longer proactively updated.
For more details, refer to Discontinued Printers. If you are interested to upgrade your products, Contact Zebra. |
Printer must be connected to and active on your network if your network has DHCP enabled.
If you network does not have DHCP enabled a crossover cable will be required for connection to a PC to configure network settings.
Overview
Zebra Card Printers equipped with a 10/100 internal network card can be used over the network to allow for printing to the device remotely from any PC on the LAN.
Depending on you network configuration, certain steps will need to be taken.
This solution applies to all Zebra Value Class (P100i, P110i, P110m, P120i) and Zebra Performance Class (P330i and P430i).
Procedure
The first step in setting up the printer for use on the network is to acquire the IP address of the printer.
If the network you are connecting to has DHCP enabled, the printer should receive an IP address from the network.
If it is not, a static IP address will have to be applied to the unit.
The following link has documentation on setting a static IP if DHCP will not assign the unit one. Read More>>
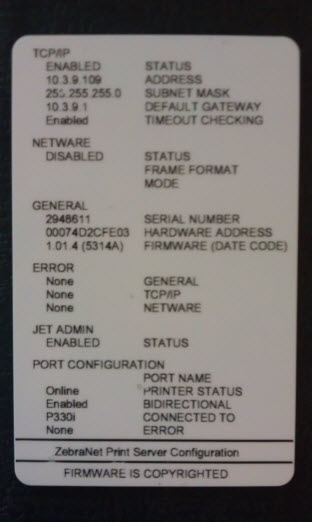
If your network will assign an IP (DHCP) to the unit, you can print a IP Configuration Card from the printer by pressing and holding in the "Reset" button next to ethernet port on the back of the unit (this may require a paperclip on Value Class printers).
It should print a network card showing the settings that it acquired from the network:
To set the IP address to something other than what it acquired or set it permanent, you can use the web interface for the network card.
Type the IP address into a web browser address bar (Internet Explorer, Mozilla Firefox, Google Chrome, etc.) to pull up the web interface:
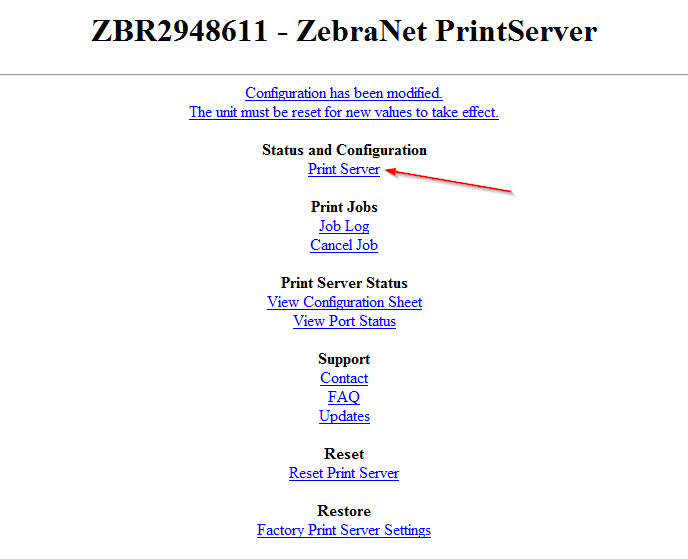
When you click on Print Server you will be prompted for a password.
The default login information should be as follows:
Username: admin
Password: 1234
Once in the Print Server settings, click on TCP/IP Configuration:
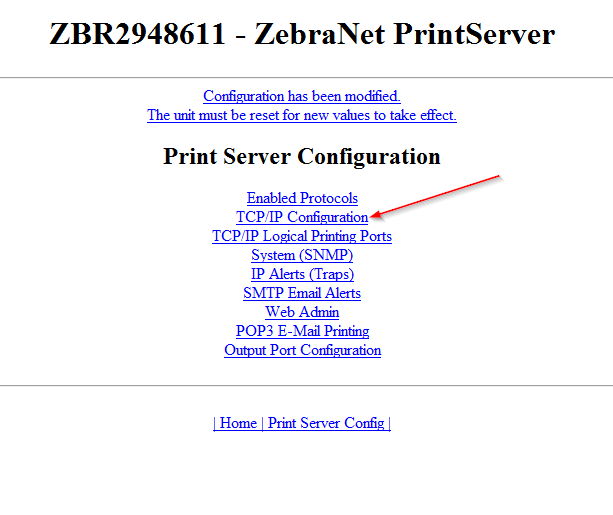
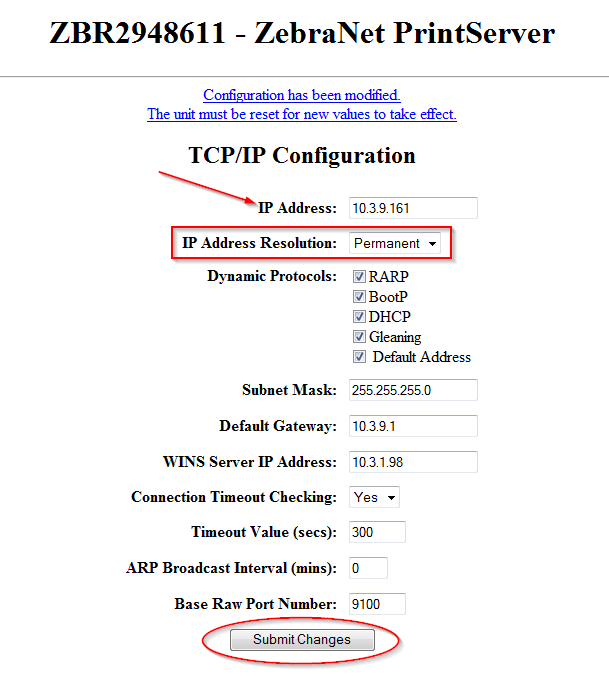
This will open up the TCP/IP Configuration where you can modify your IP address, Subnet Mask, Default Gateway, and any other network settings that need modification.
Make sure to set the IP Address Resolution to "Permanent" if you are assigning a static IP address.
Once you complete you changes, click on the "Submit Changes" button:
A notification will display after clicking Submit Changes asking you to reset the unit to apply changes, click the link:
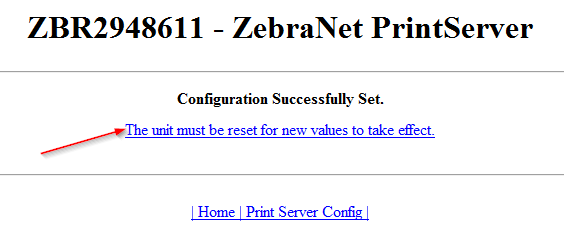
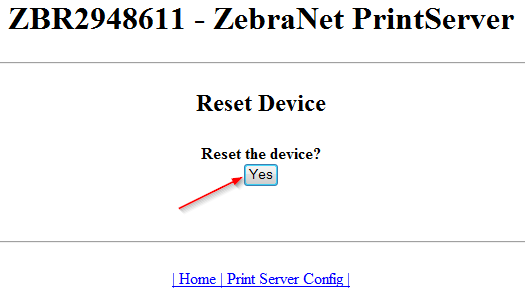
A second notification will display asking you to "Reset the Device?", click Yes and the unit will be reset.
Please allow a minute or two for the unit to apply the changes and re-establish network connection with the new settings:
This should apply the settings appropriate for the device to be used on your network.
You can attempt pinging the unit within command prompt to verify the connection via the new settings or once again enter the IP address into a web browser to verify the unit is accessible. Once this is done, you can move to installing the printer driver for the unit.
You can find the most current driver on Zebra.com Support and Downloads.
The following link will direct you to the Support and Downloads page and you can select your printer model from the drop-down under Printer Support to find the most current driver and downloads for your printer. Read More>>
Helpful Information:


