If your printer is a touchscreen version, please click the link below,
Changing the Wired TCP/IP Settings Using the Link-OS Printer with Touch Screen
Perform the steps below to change the TCP/IP settings through the LCD menu of the printer:
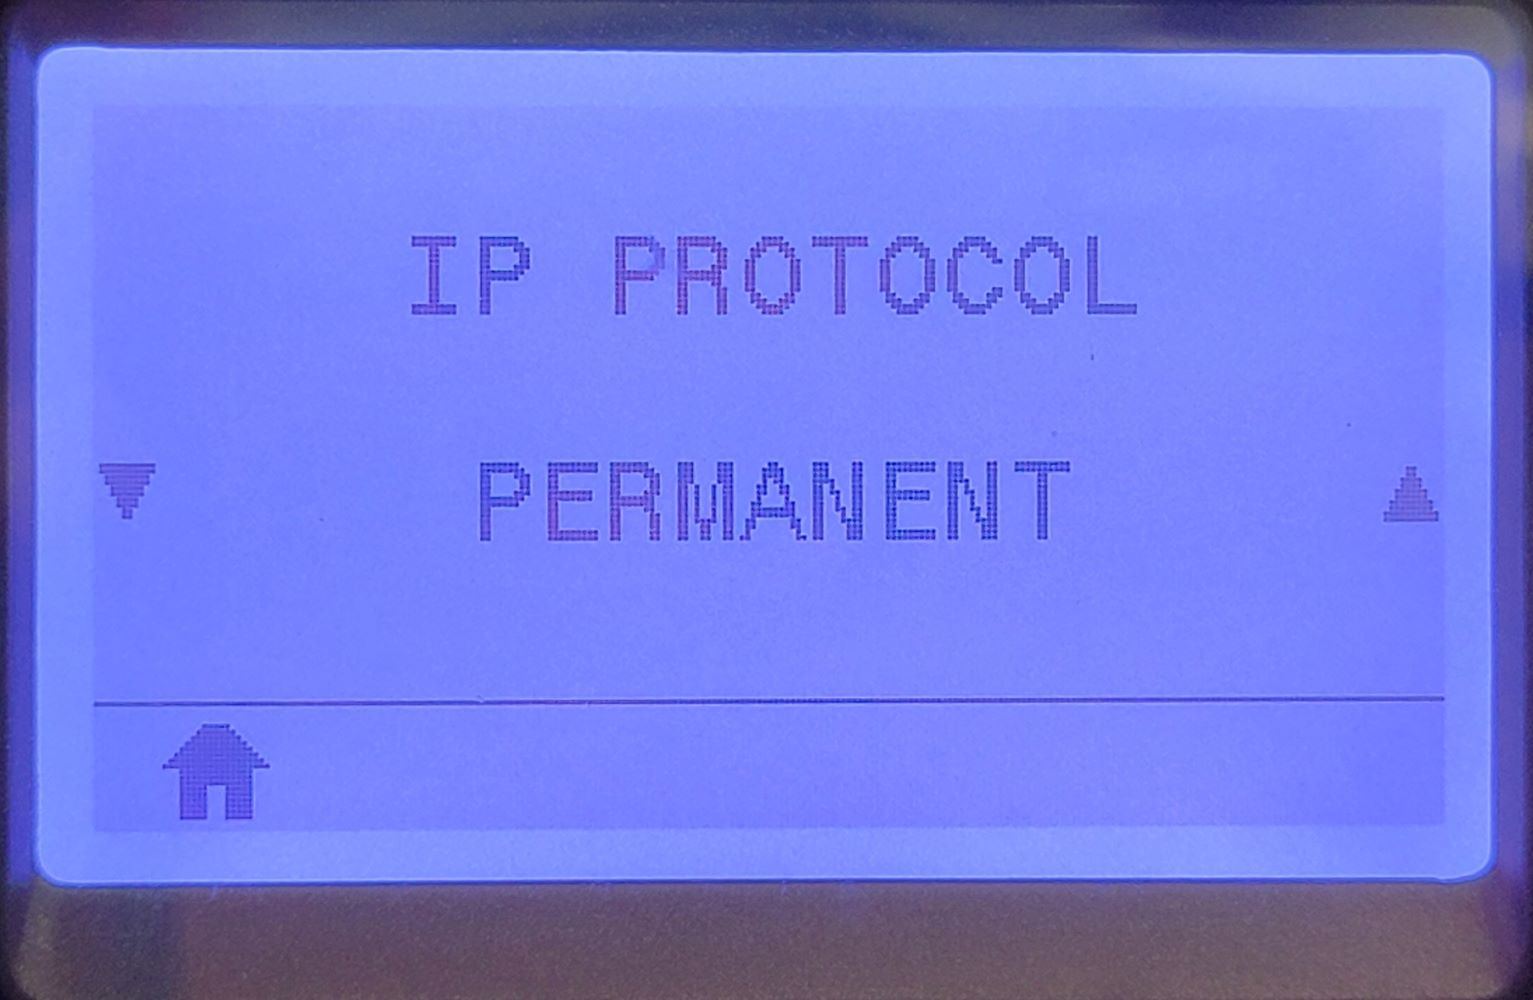
The printer's default setting is to get the TCP/IP settings from DHCP. The setting for the IP protocol must be changed from All to Permanent to assign the address settings manually.
 | NOTE: A live network connection must be activated for a wired print server option. |
Procedure:
- Press Left Select to go to the printer's Home menu.
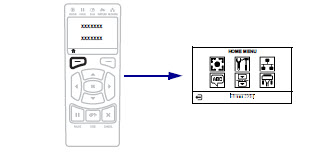
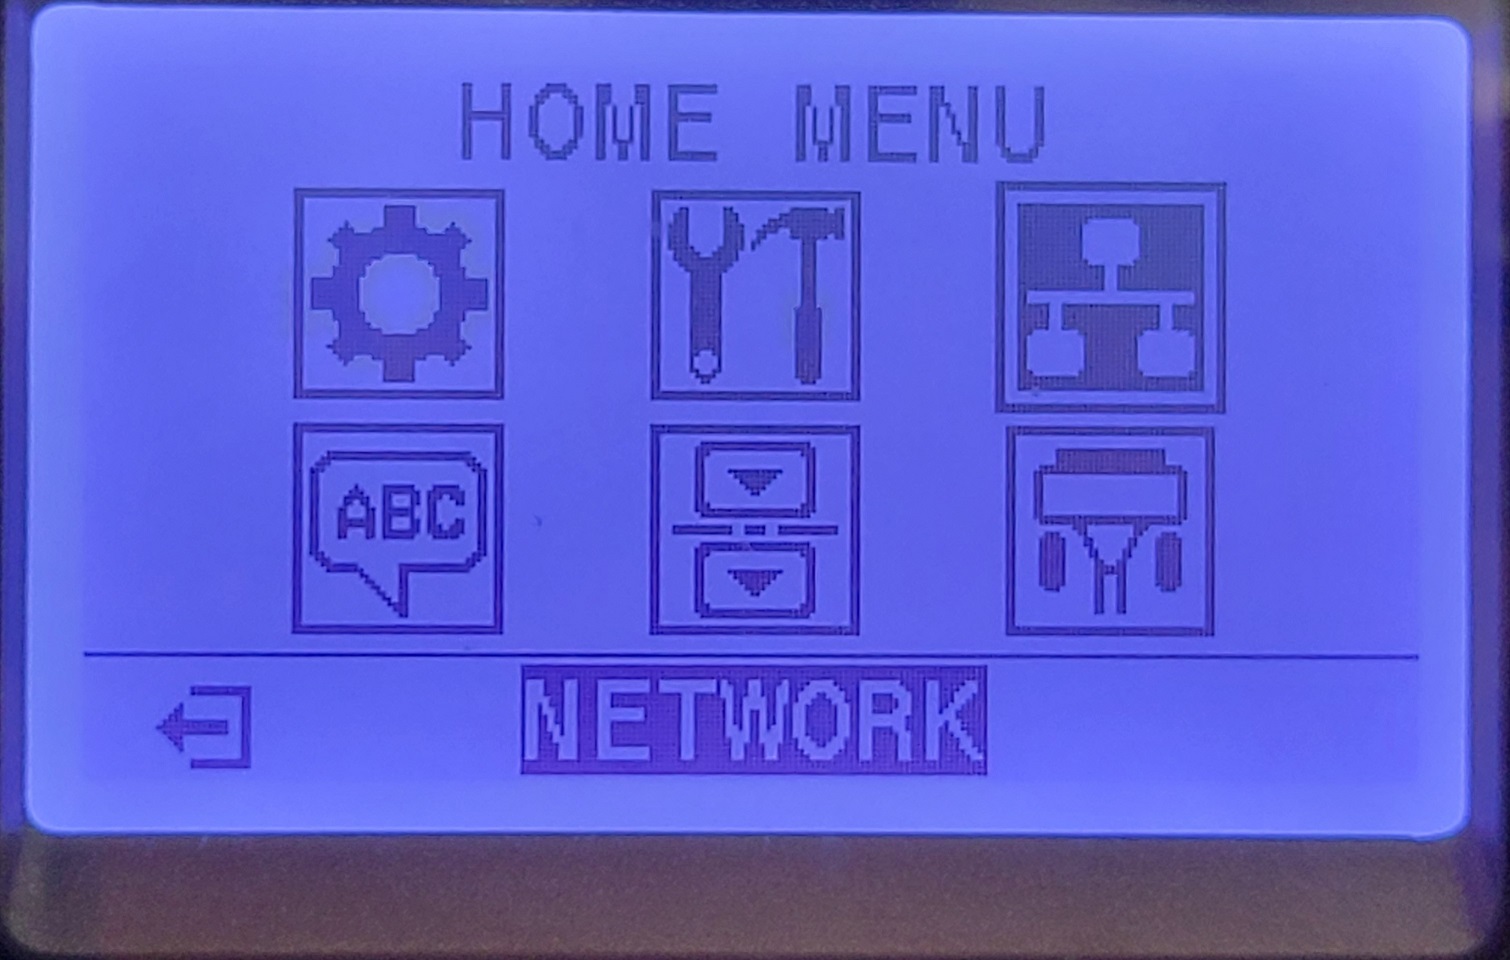
- Press the Right Arrow and scroll to the Network menu section (top row, on the right side). After the Network Menu is highlighted, press OK.
- Use the Right Arrow to scroll to the setting IP Protocol. Then, use the Up Arrow to change the setting from All to Permanent.
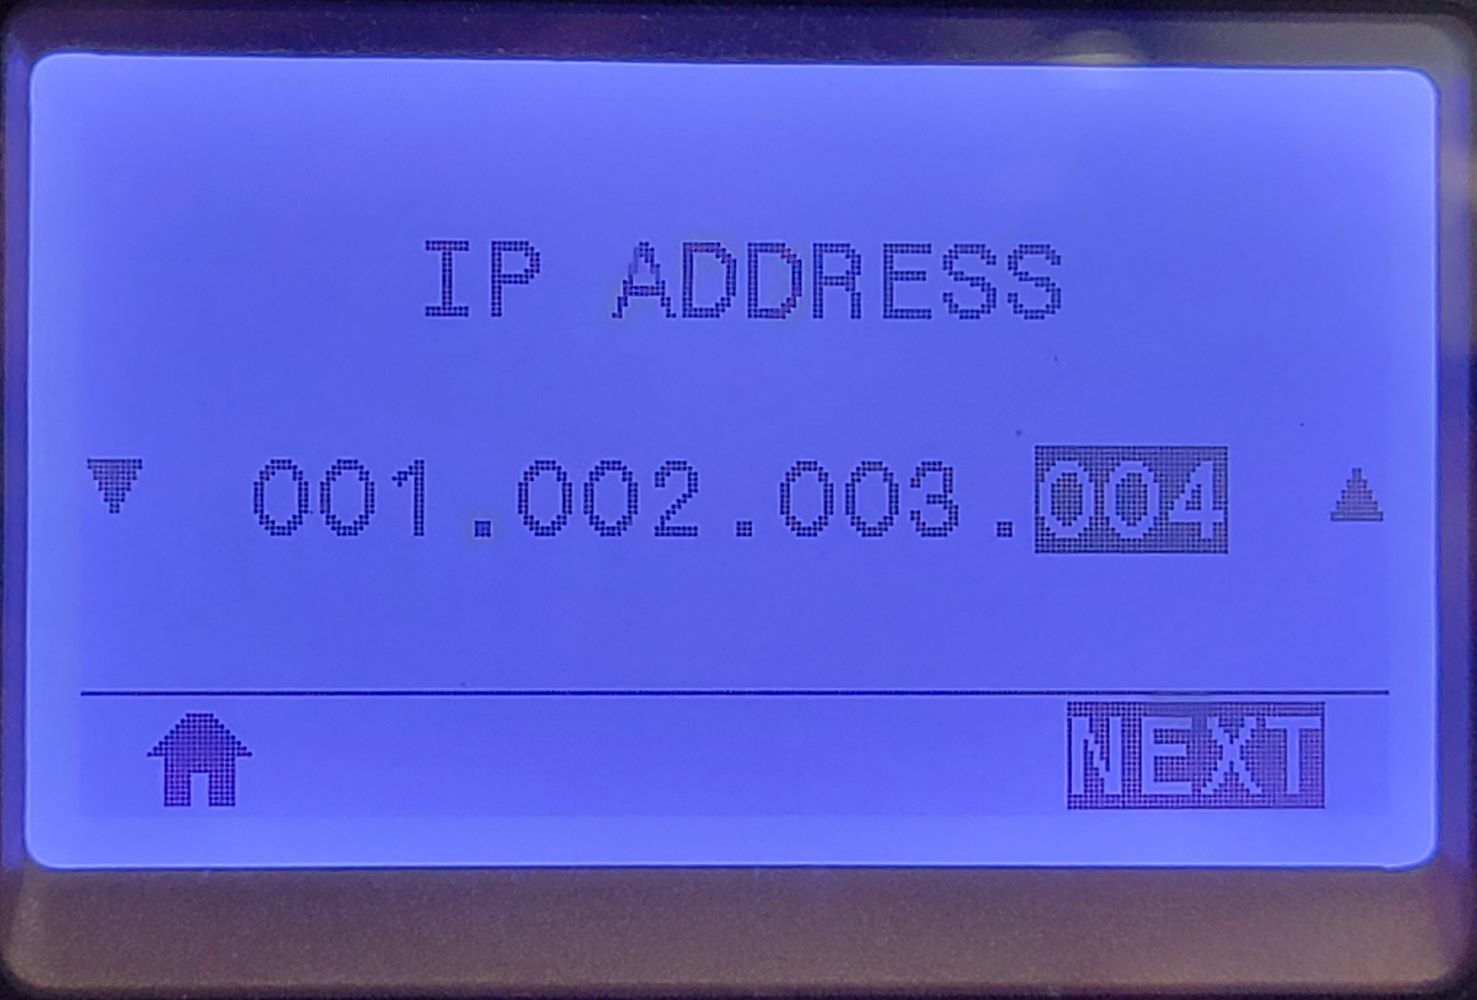
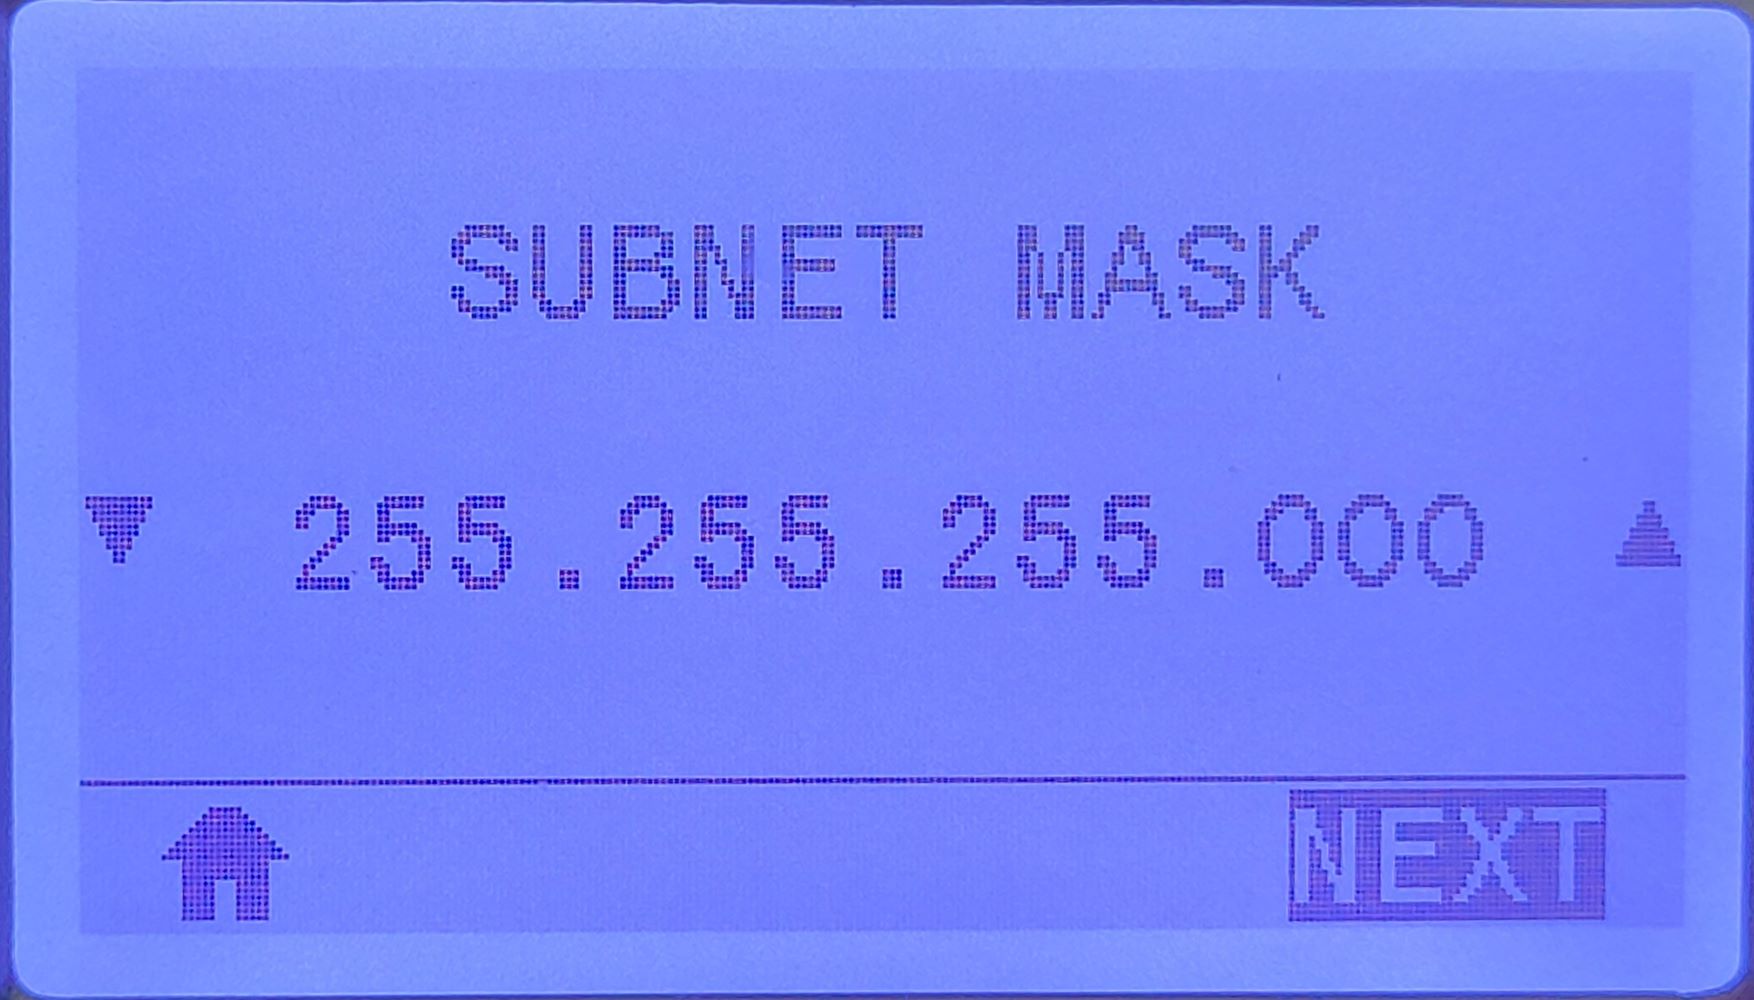
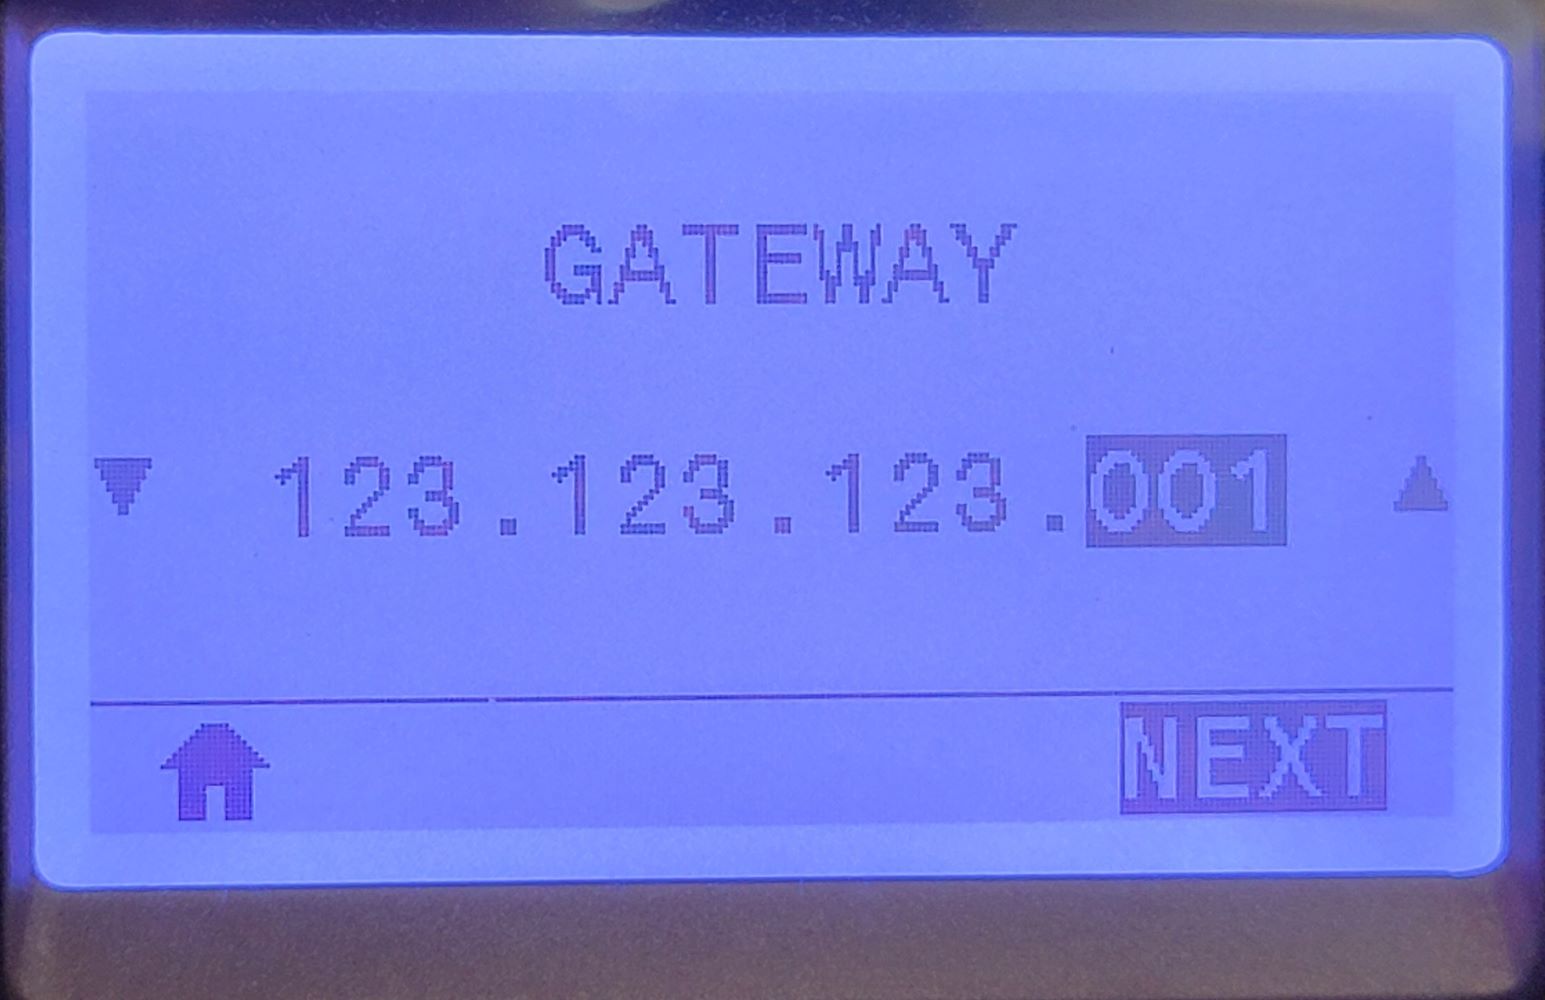
- Use the Left or Right Arrow to scroll through the menu to change the TCP/IP settings as needed: IP address, Subnet Mask, and Gateway.
- Use the Right Arrow to scroll to Reset Network. Then, use the Right Select button to Reset the print server.
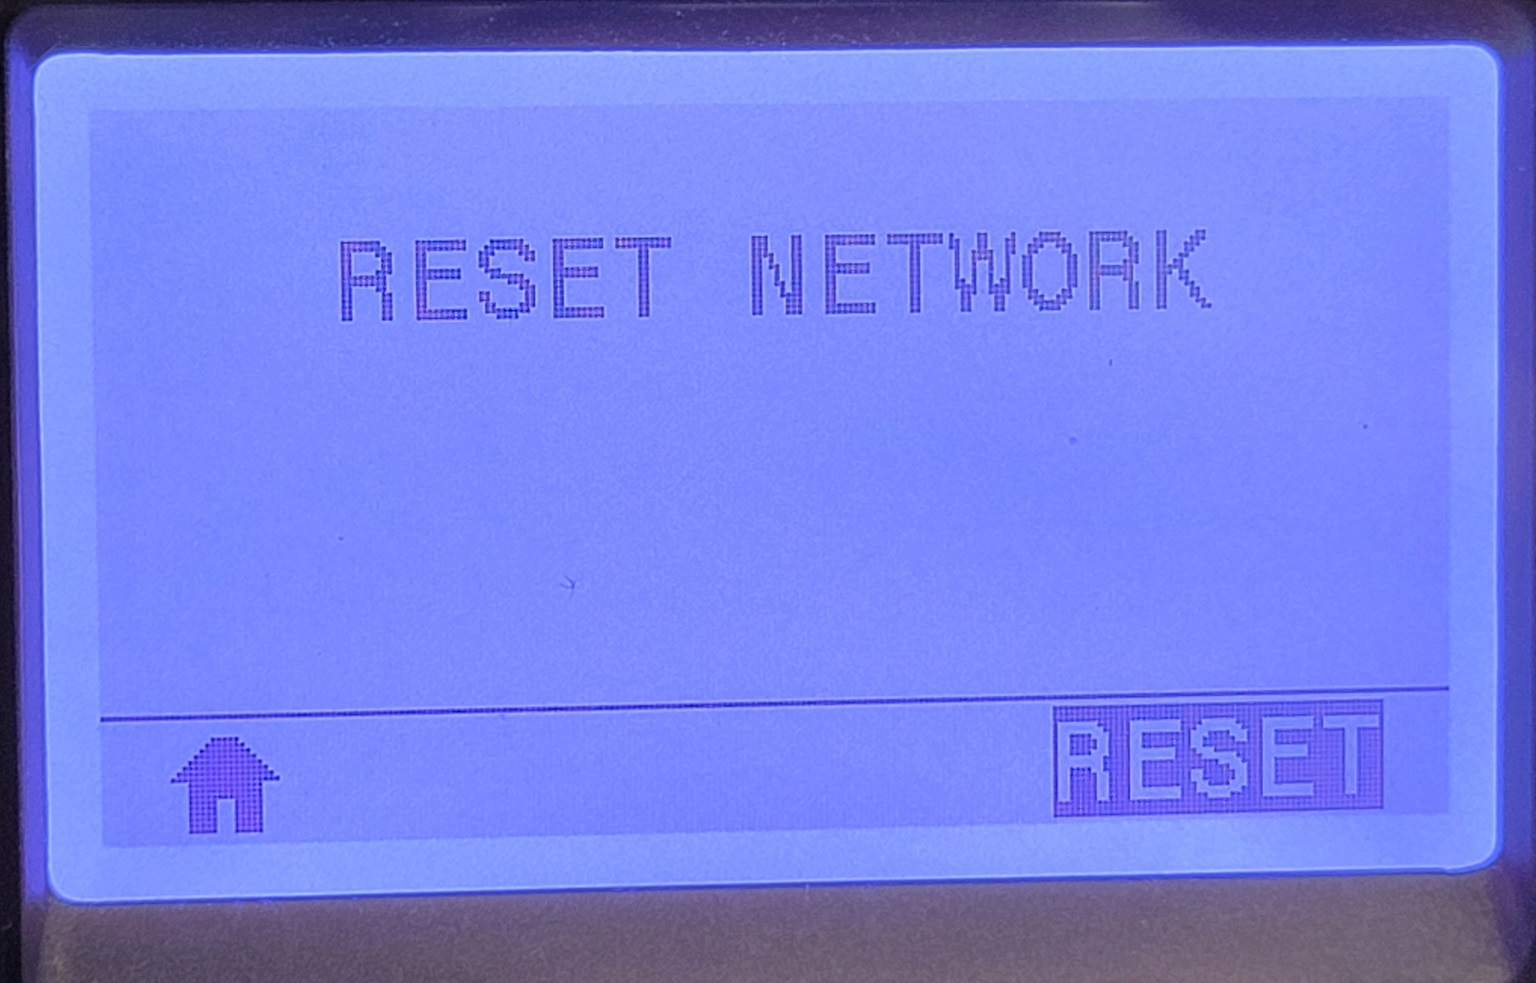
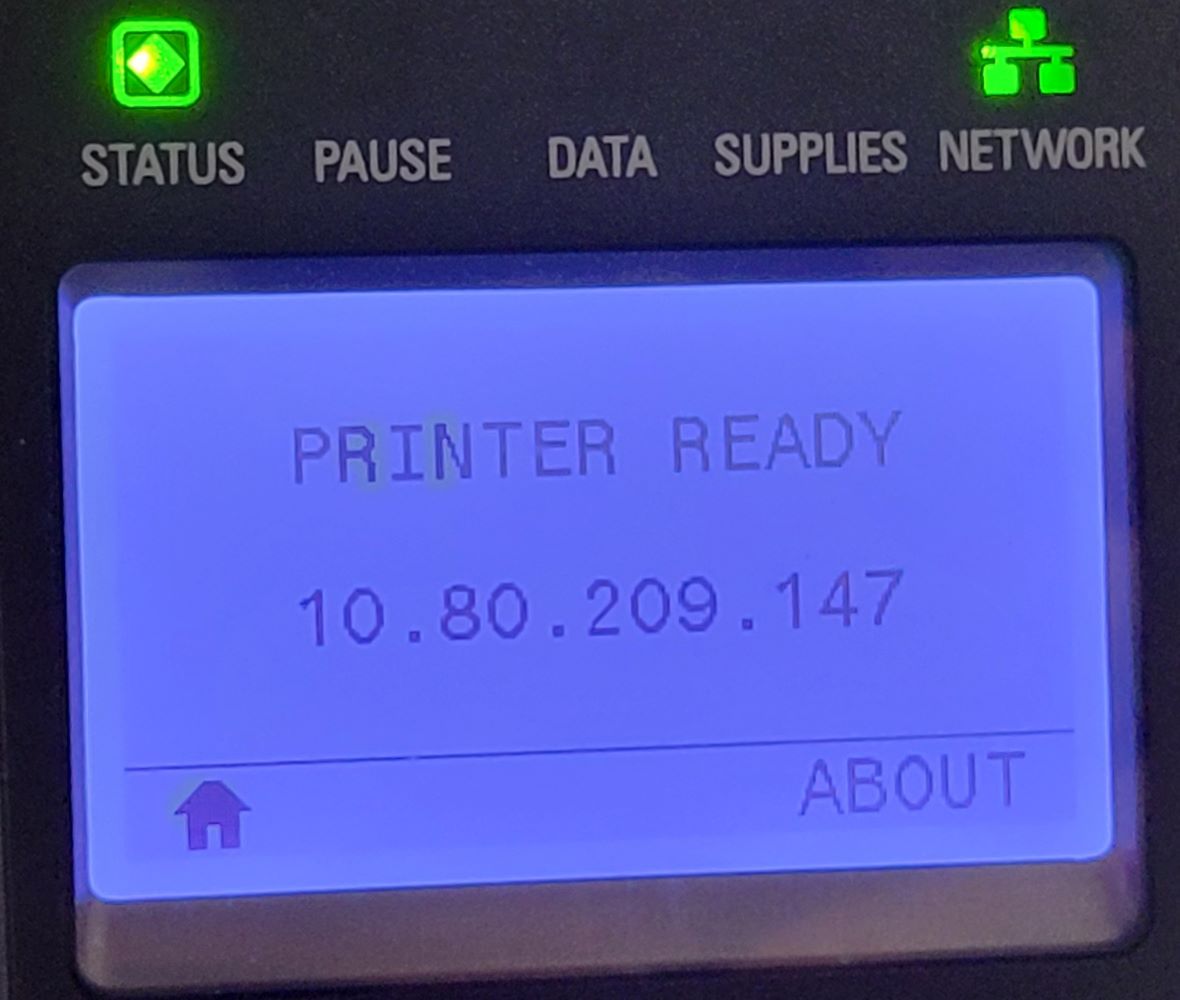
- The print server will reset, and the new network settings should be active afterward. The Network Status LED should turn solid Green. There is no need to power cycle the printer.
Helpful Information:

