Overview
With ZDesigner driver you can send files to Zebra printers without additional software or utilities using two features: Send a File and Store File to Printer.
Send File Feature
-
Purpose: This feature allows users to send files directly to the printer as a command stream. Typically, these files are in the form of ZPL scripts, which include a header specifying the storage location and file name.
-
Functionality: When a ZPL script for label printing is sent, it results in the label being printed.
-
Common Files Sent:
- Firmware Files: Used for updating or maintaining the printer’s firmware.
- Printer Language Files (ZPL): Scripts written in Zebra Programming Language to command printer actions.
- Font Files: Pre-generated with specific size and memory location for printing.
Store File to Printer Feature
-
Availability: This feature is only available in ZDesigner Driver version 10 and later.
-
Purpose: Allows storing files in specific memory locations within the printer, such as internal flash (E) or RAM ®. Unlike the Send File feature, sending a ZPL script using this feature will store it rather than print it.
-
Common Files Stored:
- Template Files: Used for creating consistent print layouts.
- ZBI Scripts: Zebra Basic Interpreter scripts for custom printer programming.
- TTF Font Files: TrueType fonts stored without conversion to Zebra-specific format.
- These features are available across various versions of the ZDesigner driver. For the latest version, users should download it from the support page of the particular printer.
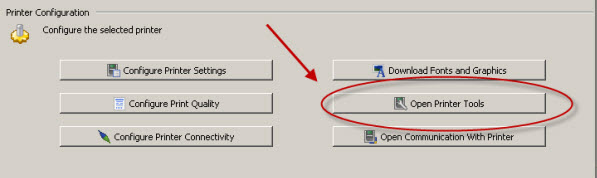
On Zebra Setup Utilities
- Open the Zebra Setup Utilities.
- Select your printer from the Installed Printer list.
- Click Open Printer Tools.
Then, you can go to any of the drivers' environments seen below.
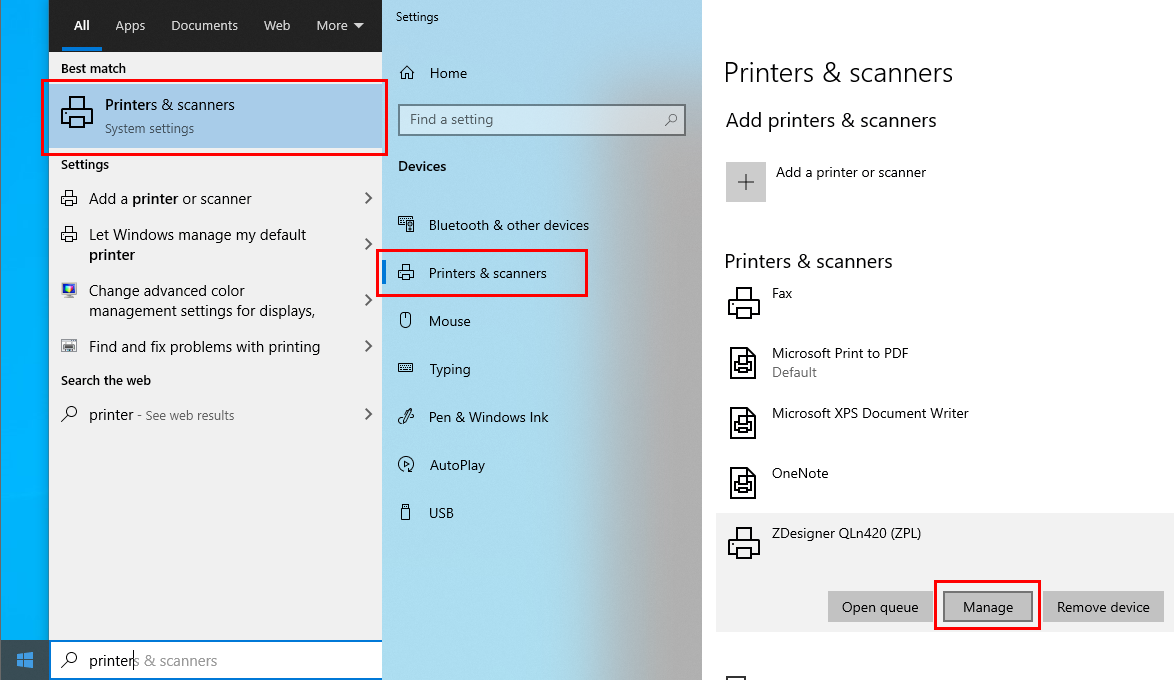
 | NOTE Instructions provided are based on Windows 10. |
- Navigate to Start > Settings > Devices > Printer and Scanners. (or enter Printer from the search bar.)
- Select the printer installed with ZDesigner driver and click Manage.
- Select Printer Properties > Driver Settings > Settings.
There are options to either
Send a file or
Send the file to the printer.
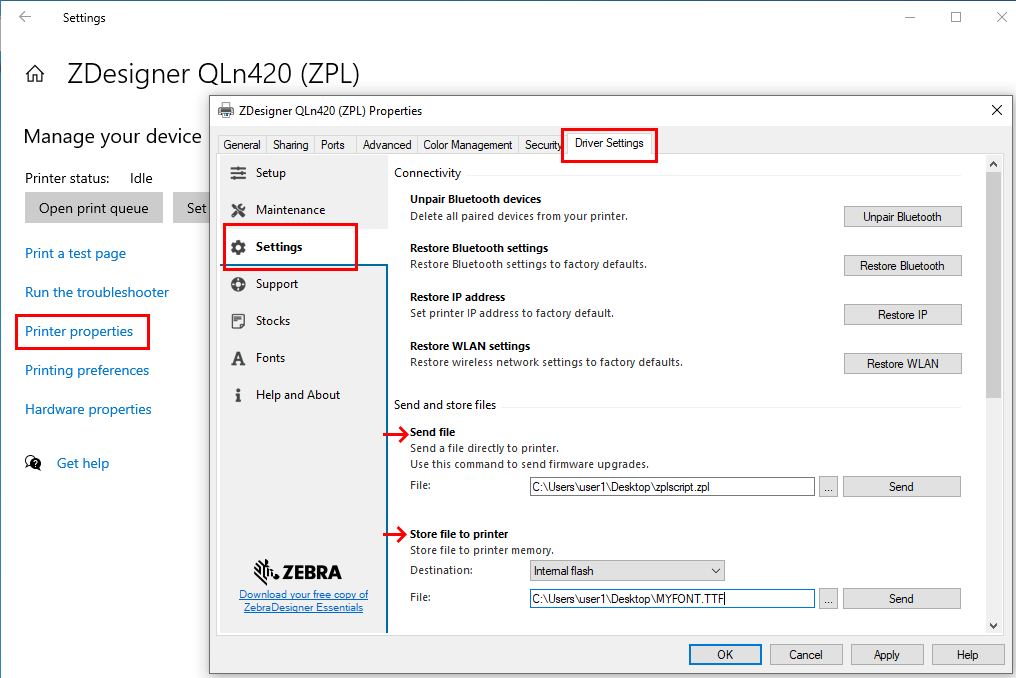
- If you select Send File, enter the full path and file name in the box or click the ellipsis (…) and point to the location and name of the file you want to send.
- Once the correct file name and path are entered, click Send.
If your printer model has a front panel display, you will see an indication that the file was received. With larger files, the data light will continue to flash until the file is complete.
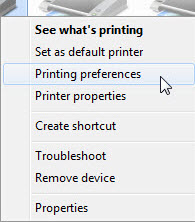
| NOTE Instructions provided are based on Windows 7. |
- Navigate to Start > Settings > Devices and Printers (or Printers and Faxes for older operating systems).
- Right-click the ZDesigner printer driver, installed it for your printer, and select Printing Preferences.
- Click Tools.
| NOTE The same option is also available for CPCL and EPL ZDesigner drivers. |
- Under the Command type, make sure Action is selected and the Send file option is available.
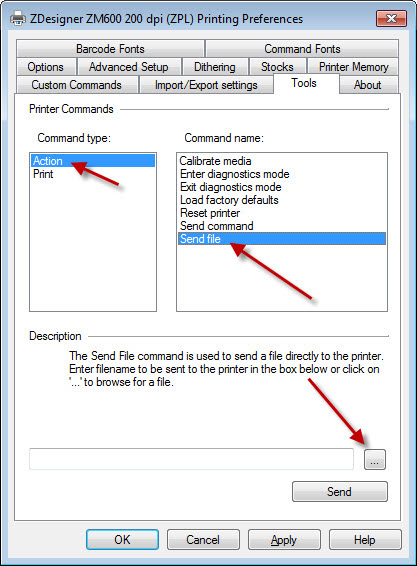
- Enter the full path and file name in the box or click on the ellipsis (…) and point to the location and name of the file you want to send (firmware file, printer language (ZPL) file, font file with size and memory location already generated, etc.)
- Click Send.
- If your printer model has a front panel display, you will see an indication that the file was received. With larger files, the data light will continue to flash until the file is complete.
Helpful Information

