Requirements
A crossover cable and PC to connect to are required as well as an active ethernet connection to your network.
Procedure to configure a print server with a static IP.
(This is applicable for value class and performance class printers only and if
the customer is not using DHCP)
- Use a crossover to connect to the printer’s and your P.C’s Ethernet connection (if a crossover cable is not available, connect the printer and P.C. to a standalone hub using a standard Ethernet cable).
- After powering on the printer wait about 2 minutes. The print server should default to an IP address of 192.168.254.254
- On your P.C. go to START – Settings – Network Connections.
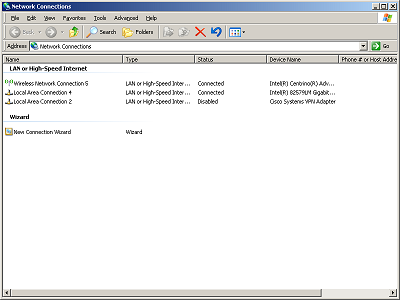
- Right click on a Local Area Connection that shows a status of Connected and select Properties.
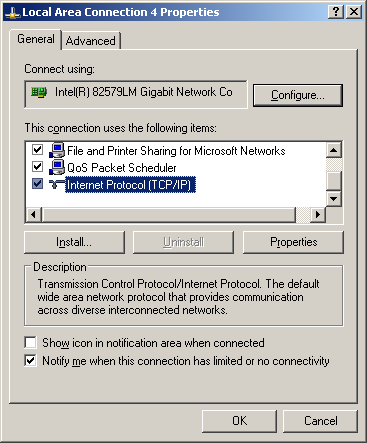
- You should see Internet Protocol (TCP/IP) on the list of items. Click on it and then click on Properties.
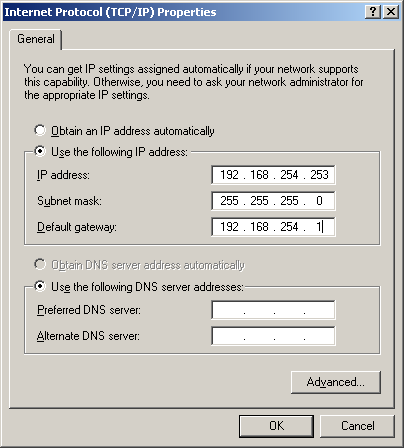
- The P.C. must be set to the same network as the printer. If Obtain an IP address automatically is selected, select Use the following IP address. Since the printer’s default IP is 192.168.254.254 set the P.C.’s IP to 192.168.254.253. Use the image below for the rest of the fields (If “Obtain and IP address automatically” is not selected, you must note the IP address, subnet mask and default gateway that it’s set to. You have to enter this information back into this section once you’re done configuring the print server in order for your P.C. to connect to the network) :
- After clicking OK, you can now take that IP address and type it into the address bar of your browser and configure the printer for the Static IP that will work on the network that the printer is going to connect to.
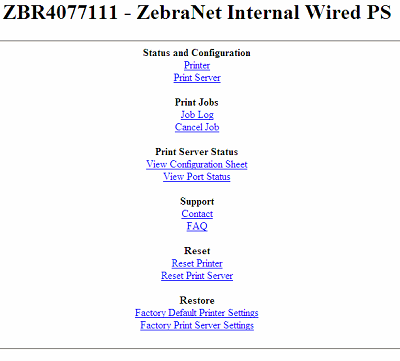
- Click on the Print Server link. You’ll be prompted for a username (admin) and password (1234).
- After putting in the username and password you’ll get the screen below:
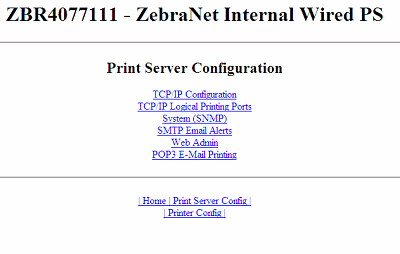
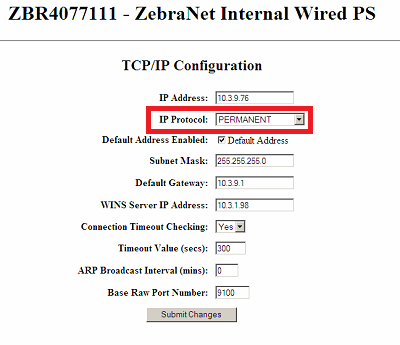
- Click on the TCP/IP Configuration link. From here you can configure your network settings. Make sure you change the IP Protocol to PERMANENT (red arrow in the image below).
- Click the 'Submit Changes button'
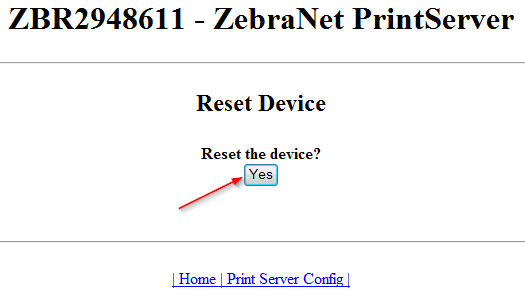
- A notification will display after clicking Submit Changes asking you to reset the unit to apply changes, click the link:

- A second notification will display asking you to "Reset the Device?", click Yes and the unit will be reset. Please allow a minute or two for the unit to apply the changes and re-establish network connection with the new settings:
If a login is required at any point during the configuration of the printer please click the following link for login credentials information particular to your printer model. Network Password for Zebra Card Printer Web Interface (HTTP)
Helpful Information
Setting IP address on Zebra Value Class and Performance Class Printers with DHCP IP Address Setting IP Address on Zebra Value Class and Performance Class Card Printers
IP Address of Zebra Card Printer Showing Default IP "192.168.254.254" IP Address is listed as 192.168.254.254 on Zebra Card Printer
Installing Network Driver for Zebra Value Class and Performance Class Printers Installing Network Driver for Zebra P100, P300, and P400 Series Card Printers

